
Giving a handmade bracelet means offering a unique item. For a birthday, a celebration, or simply for fun, DIY bracelets for teens allow for the creation of personalized gifts with minimal materials. Beads, colored threads, charms: the techniques vary, but the principle remains the same. You start with a thread or cord, and you create something meaningful for the person receiving it.
Here are ten concrete techniques, from the simplest to the most elaborate, for making original bracelets to give or keep.
Read also : How to choose the best carrier for Belgium?
1. Three-String Chevron Brazilian Bracelet
![]()
The Brazilian bracelet remains the absolute classic of DIY for teens. The three-string version is perfect for beginners: you secure the threads with tape on a table, then alternate flat knots left and right. The V pattern (chevron) naturally appears after a few rows.
Read also : 10 unforgettable destination ideas for a discovery-rich trip
Three colors are enough. If you’re looking for other DIY bracelet ideas for teens, kits with pre-cut threads and instructions make it even easier to get started. Allow about twenty minutes for a complete bracelet.
2. Friendship Bracelet with Letter Beads
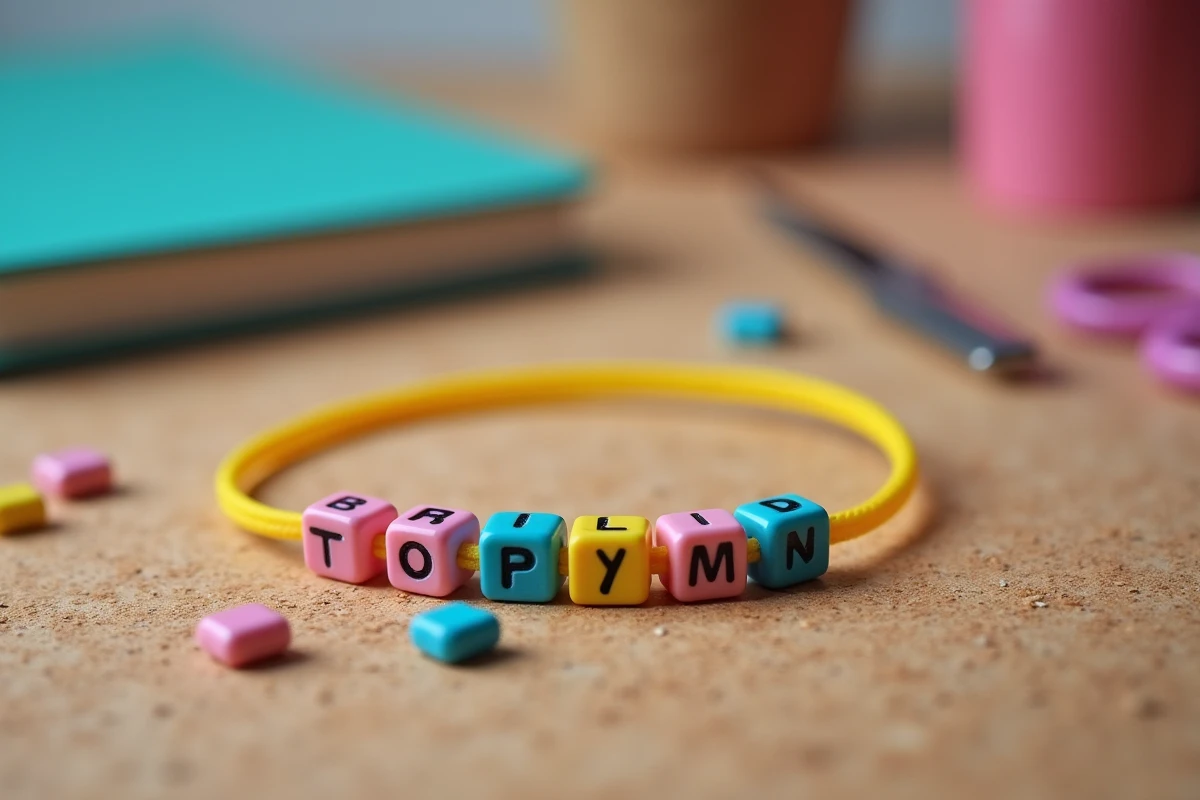
Since concerts and the culture of bracelet exchanges among fans, letter bead bracelets have seen a resurgence in popularity among teens. The principle: string alphabet beads on elastic thread to spell a name, a word, or a snippet of song lyrics.
Choosing a transparent elastic thread makes stringing easier and makes the bracelet comfortable to wear. You can alternate letter beads and small colorful seed beads to create a visual rhythm. The final knot is done double, then the excess is tucked into a bead.
3. Macramé Bracelet with Flat Knots
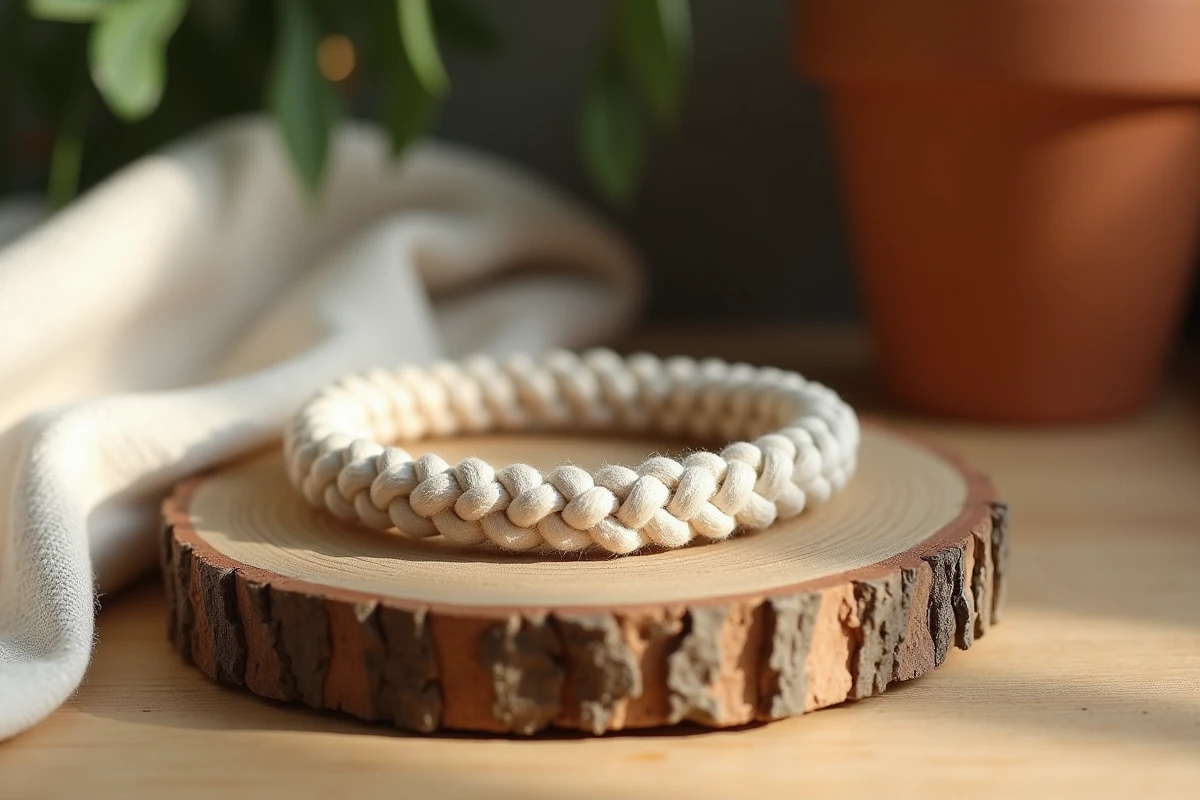
Macramé gives a more structured look than the Brazilian style. One knot is enough to start: the flat knot. You work with four strands (two central support strands, two working strands on the sides). By repeating the same motion, you achieve a regular braid that resembles a small flat cord.
Waxed cord or thick cotton thread works well. To close the bracelet, you use a sliding knot that allows for size adjustment without a metal clasp.
4. Loom Rubber Band Bracelet
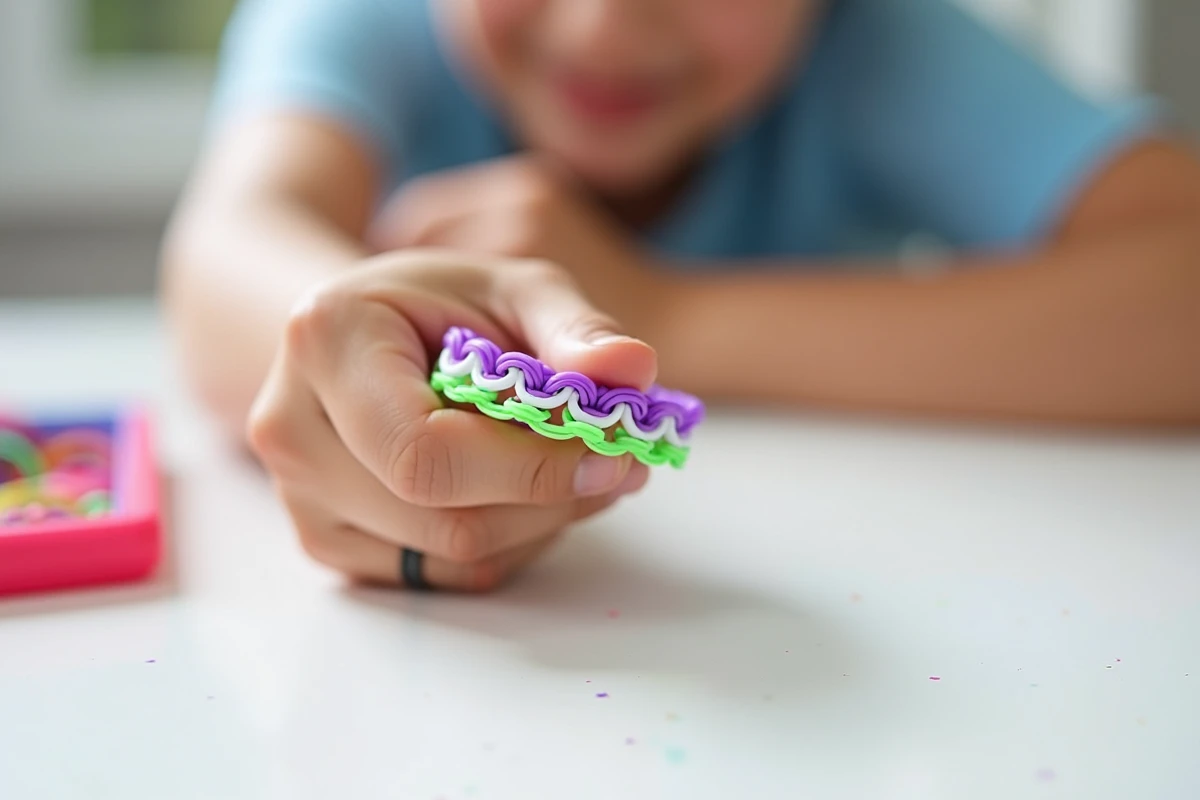
The loom bracelet is made with small colored rubber bands, using a miniature loom or simply two fingers. The basic technique (simple chain) can be learned in a few minutes. More complex patterns (fish tail, ladder) require a bit more patience.
This technique appeals to teens who enjoy bright colors and quick results. A basic bracelet takes less than ten minutes. Loom rubber bands are easily found in craft stores, often sold by the hundreds in assorted boxes.
5. Braided Bracelet on Chain
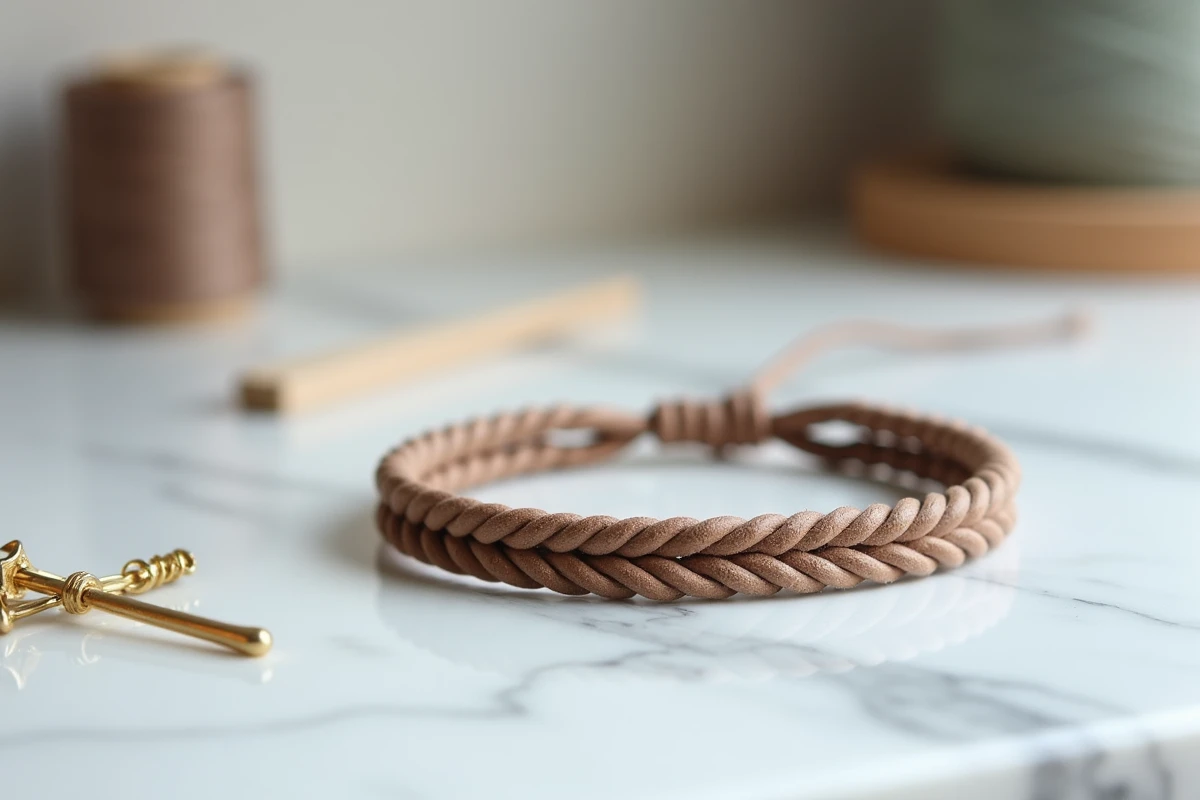
For a more polished look, you can braid cotton or wool thread directly onto a chunky chain. The thread weaves between the links, creating a bohemian effect with a solid structure.
Secure the chain with a clip and weave the thread in a zigzag through each link. Two or three colors of thread create a nice contrast with the metal. Checking that the chain is nickel-free prevents skin reactions, an important point for a teen gift.
6. Wrap Bracelet with Seed Beads
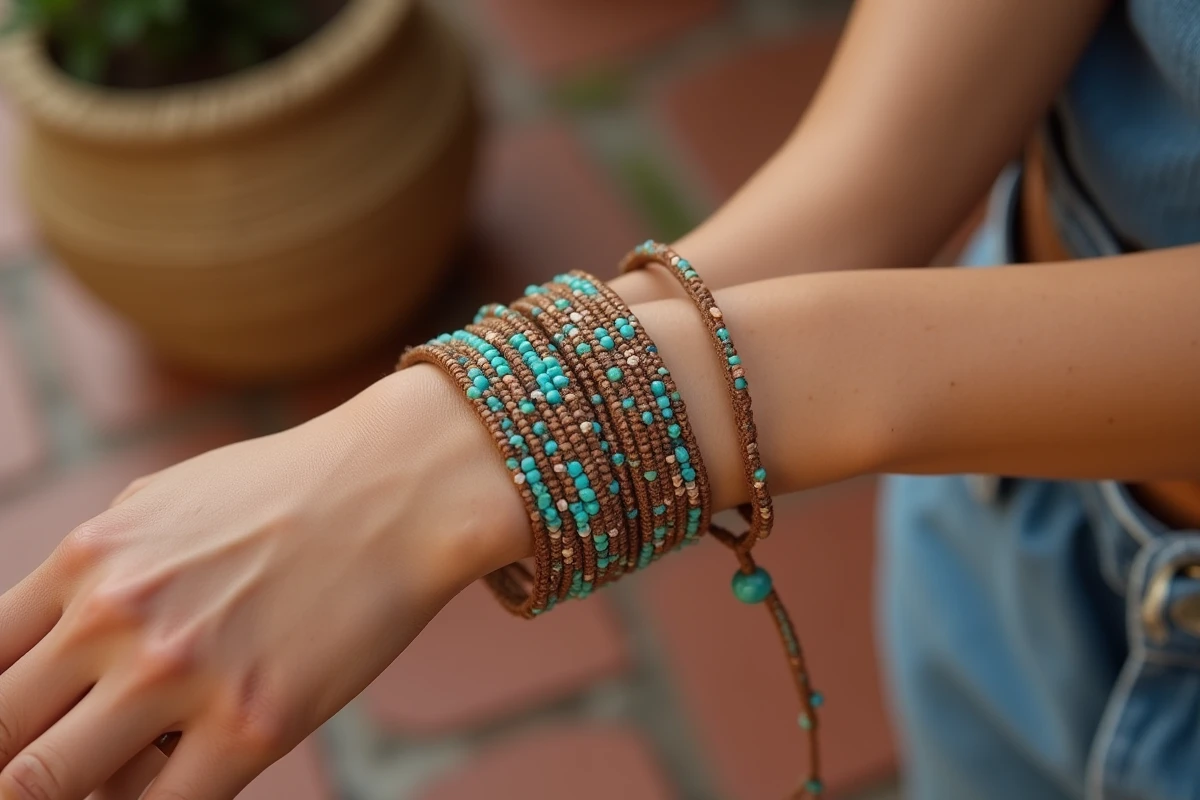
The wrap bracelet makes several turns around the wrist. You use memory wire (rigid spiral wire) or a long leather cord on which you sew seed beads. The result resembles a designer bracelet, but the technique remains accessible.
With memory wire, no clasp is needed: the wire retains its shape. With a cord, you add a button as a clasp. Seed beads offer an almost unlimited color palette, allowing for the customization of each bracelet according to the recipient’s tastes.
7. Wire Cuff Bracelet with Charm
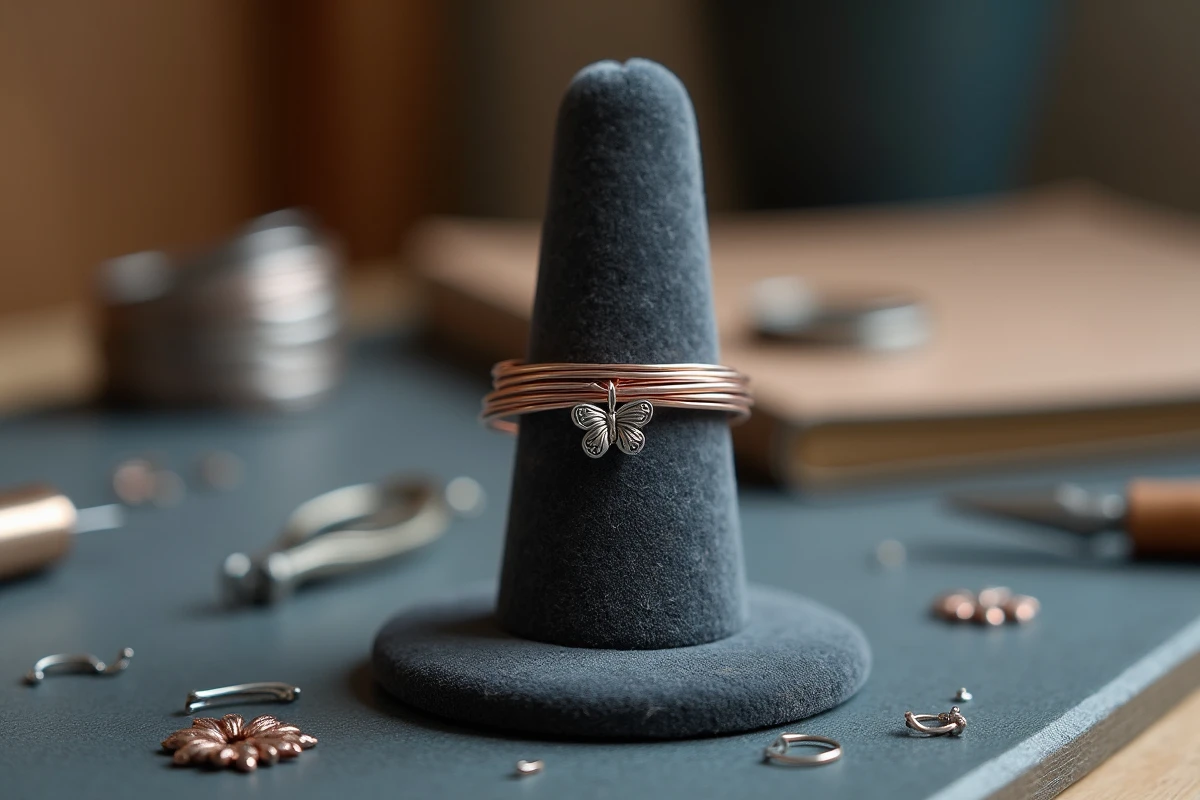
The cuff consists of wrapping several layers of thread (cotton, linen, fine metal wire) around a rigid base, then attaching a charm or pendant. You can use an old rigid bracelet as a support, or shape a base with aluminum wire.
Adding a charm (feather, star, initial) transforms a simple bracelet into a personalized piece of jewelry. Gluing the ends of the wire with a bit of fabric glue prevents it from coming undone with use.
8. Kumihimo Bracelet with Eight Strands
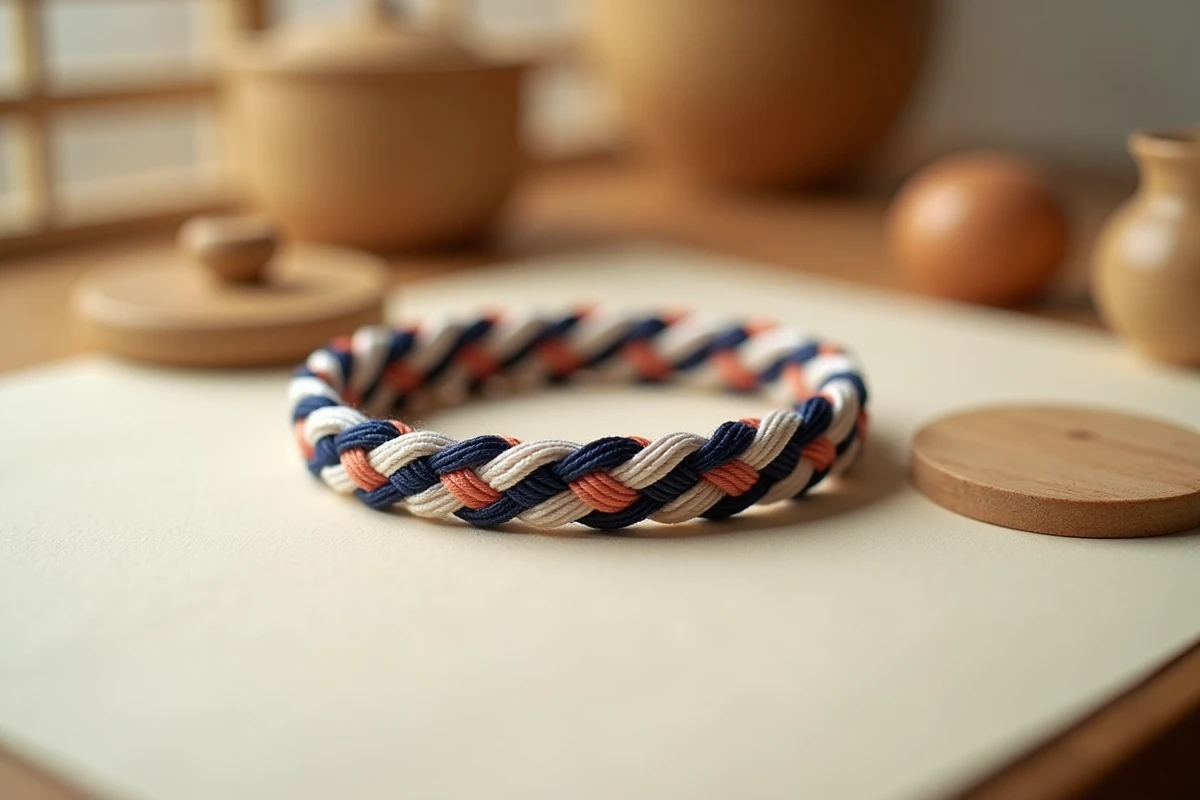
Kumihimo is a Japanese technique for circular braiding. You make a disk from cardboard (or buy one), secure eight strands to it, and move them according to a simple pattern. The result is a round, dense cord, very different from a flat bracelet.
The movement is repetitive and almost meditative. Teens who enjoy calm manual activities appreciate this method. With eight strands of two alternating colors, you achieve a regular spiral pattern without complex calculations.
9. Crochet Bracelet with Integrated Beads

A fine crochet hook (size 2 or 3) and cotton thread are all you need. You string the beads onto the thread before starting, then integrate them one by one into the stitches. The resulting bracelet is fine, flexible, and the beads appear embedded in the fabric.
This technique requires knowing how to make a chain and tight stitches, nothing more. A short video tutorial is enough to master the basics. Crochet also allows for creating patterned bracelets by playing with thread colors.
10. Message Bracelet in Peyote Weaving
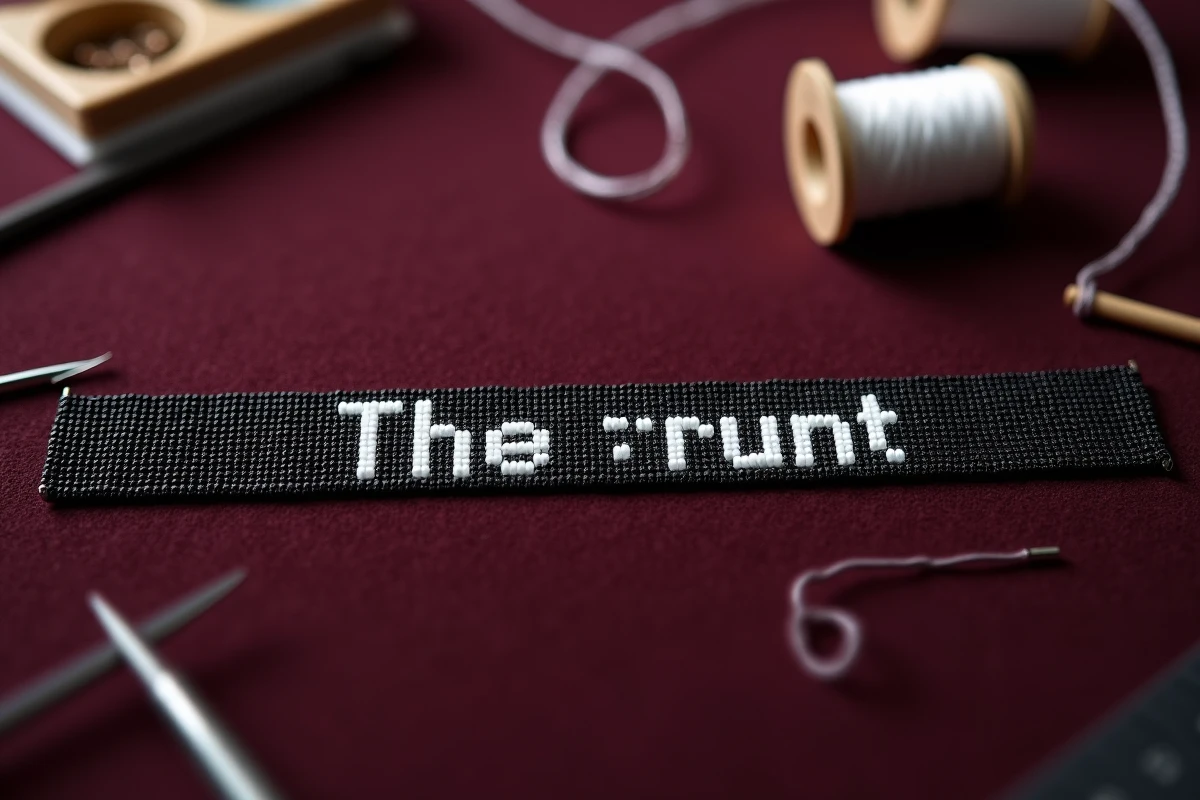
Peyote weaving uses Miyuki beads (very regular cylindrical beads) to create a flat bracelet with precise patterns: initials, hearts, geometric shapes. You work with a fine needle and nylon thread, offsetting each row by half a bead.
The result is neat, and the bracelet looks like a store-bought piece of jewelry. The technique requires more patience than the previous ones, but the result justifies the effort. To prepare the pattern, you can draw on graph paper or use a free peyote grid application.
- Miyuki Delica beads (size 11/0) for a uniform result
- Fireline type nylon thread for its strength
- Long, fine beading needle to pass through the small beads
Each technique presented here can be done with materials accessible in craft stores or online. The choice between thread, beads, or rubber bands mainly depends on the style of the person receiving the bracelet. A colorful Brazilian bracelet sends a different message than a monochrome peyote weave. The gift’s value lies in the time spent making it, not in the cost of the supplies.